On This Page
Creative Ways to Incorporate a 6x6x4 Glass Block into Your Space
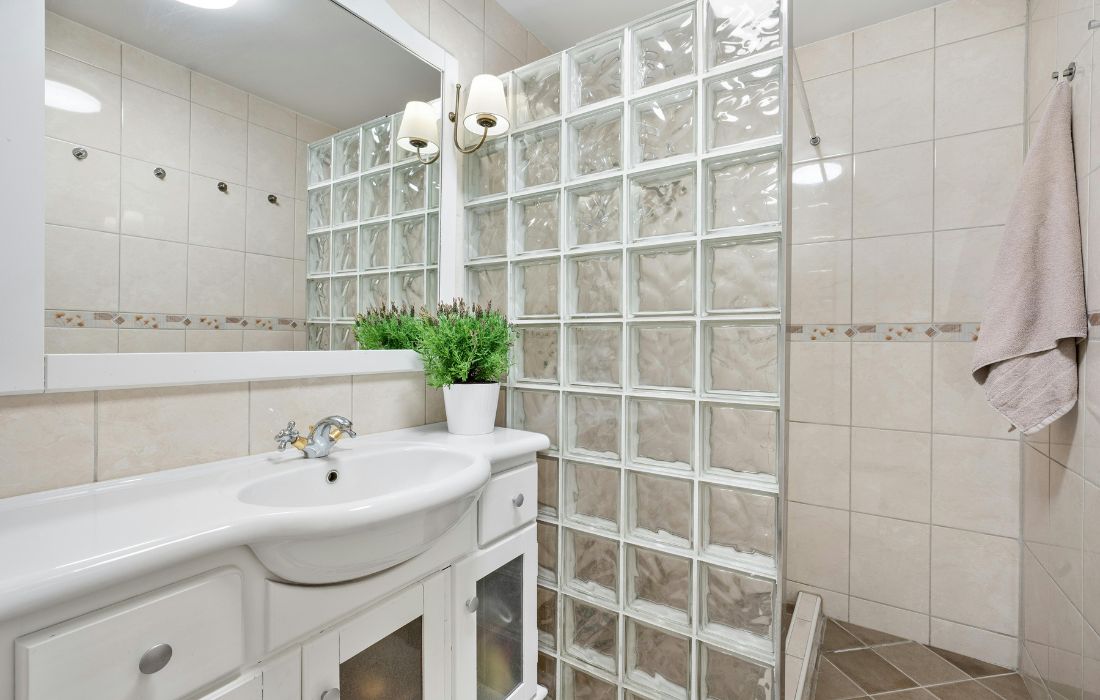
1. Nubio Glass Block in Shower Walls
One of the most popular uses for 6x6x4 glass blocks is in shower walls. I recently renovated my own bathroom and chose to use a Nubio glass block for my shower wall. The stunning transparent wall maintains privacy while allowing light to shine through, creating a beautiful focal point in the bathroom.Benefits of Using Glass Blocks in Showers
- Privacy: Glass blocks obscure visibility while still allowing light, making them perfect for shower walls.
- Easy to Clean: Glass surfaces are smooth, making them easy to clean and maintain.
2. Accent Walls
Another creative way to use 6x6x4 glass blocks is in accent walls. These blocks can define spaces in your bathroom, such as separating the vanity from the toilet area or simply adding a decorative touch behind a freestanding tub.Designing an Accent Wall
- Placement: Choose a wall that can serve as a backdrop for a beautiful tub or a mirror to enhance light reflection.
- Color Coordination: Ensure the colors of the glass blocks match or complement your bathroom’s color scheme.
3. Windows and Partitions
Using 6x6x4 glass blocks in windows or as room partitions can create a bright and airy atmosphere. They are an excellent alternative to traditional windows, providing light without compromising privacy.Benefits of Glass Block Windows
- Natural Light: Allow sunlight to filter into your space while blocking outside views.
- Energy Efficiency: Glass blocks can provide insulation, helping to maintain a comfortable temperature.
4. Vanity Backdrops
Creating a backdrop for your vanity with 6x6x4 glass blocks adds a unique touch to your space. This installation can reflect light and create an inviting atmosphere, enhancing the overall design of your bathroom.Tips for Vanity Backdrops
- Lighting: Incorporate LED lighting behind the glass blocks for a stunning glow.
- Framing: Consider framing the glass block installation with wood or metal for a polished look.
Step-by-Step Guide to Installing 6x6x4 Glass Block
If you’re considering a DIY project to install 6x6x4 glass block, follow this step-by-step guide to ensure a successful installation.Tools and Materials Needed
- 6x6x4 glass blocks (consider Nubio for quality)
- Glass block mortar or adhesive
- Trowel
- Level
- Measuring tape
- Safety goggles
- Gloves
Safety Considerations
When handling glass blocks, always wear safety goggles and gloves to protect your eyes and hands. Ensure that your work area is clear of obstacles and that you have a stable surface to work on.1. Planning Your Design
Before you start, plan the design and layout of your glass blocks. Measure the area where you will install them and determine how many blocks you will need.2. Preparing the Area
Ensure the surface where you will install the blocks is clean and dry. Remove any old materials and patch any holes or imperfections in the wall.3. Mixing the Mortar
Follow the instructions on your glass block mortar or adhesive to mix the proper consistency. It should be thick enough to hold the blocks in place but still spreadable.4. Laying the First Row
Start by laying the first row of blocks. Apply a layer of mortar on the base where the blocks will sit. Place the first block, checking with a level to ensure it is straight.5. Adding Additional Rows
Continue adding blocks row by row. Apply mortar between each block and on top of the previous row to secure them in place. Use spacers between blocks to maintain even gaps for grout.6. Finishing Touches
Once all blocks are installed, allow the mortar to cure as per the manufacturer’s instructions. After curing, you can apply grout if desired, filling the gaps between the blocks.Choosing the Right Style:
| Creative Use | Description | Key Benefits |
| Shower Walls | Use glass blocks to create a stunning, light-filled shower enclosure. | Privacy, easy to clean, aesthetic appeal |
| Accent Walls | Incorporate glass blocks to define areas or add decorative touches behind fixtures. | Space definition, color coordination, visual interest |
| Windows and Partitions | Install glass blocks as windows or room dividers to enhance light and privacy. | Natural light, energy efficiency, unique design |
| Vanity Backdrops | Use glass blocks behind your vanity to create a reflective and inviting atmosphere. | Enhanced lighting, stylish design, unique backdrop |
Finishes and Colors for 6x6x4 Glass Blocks
Selecting the right finishes and colors for your 6x6x4 glass blocks can significantly affect the overall aesthetic of your bathroom. Here are some options to consider:1. Clear vs. Frosted Glass Blocks
- Clear Glass Blocks: These blocks allow maximum light transmission and create a more open feel. They are ideal for modern, minimalist spaces.
- Frosted Glass Blocks: These provide more privacy while still allowing light to filter through. They are perfect for areas where visibility is a concern.
2. Color Options
While clear and frosted are the most common options, glass blocks come in various colors. Consider the following:- Tinted Glass Blocks: Available in shades like blue, green, or amber, tinted blocks can add a pop of color and personality to your bathroom.
- Textured Finishes: Textured blocks can enhance the visual interest and create unique patterns when light passes through.
3. Custom Designs
For a truly unique look, consider custom-designed blocks. You can incorporate patterns, etchings, or even images into your glass blocks, allowing for personal expression in your bathroom design.Maintenance Tips for Keeping Your 6x6x4 Glass Block Feature Pristine
To ensure that your 6x6x4 glass block feature remains beautiful and functional, regular maintenance is essential. Here are some tips to help you keep your glass blocks looking their best:1. Regular Cleaning
Glass blocks are relatively easy to clean. Use a mild detergent mixed with water or a glass cleaner to wipe down the surface regularly. Avoid abrasive cleaners that could scratch the glass.Cleaning Technique
- Soft Cloth or Sponge: Use a soft cloth or sponge to avoid scratching the glass surface.
- Squeegee: After cleaning, use a squeegee to remove excess water and prevent water spots.